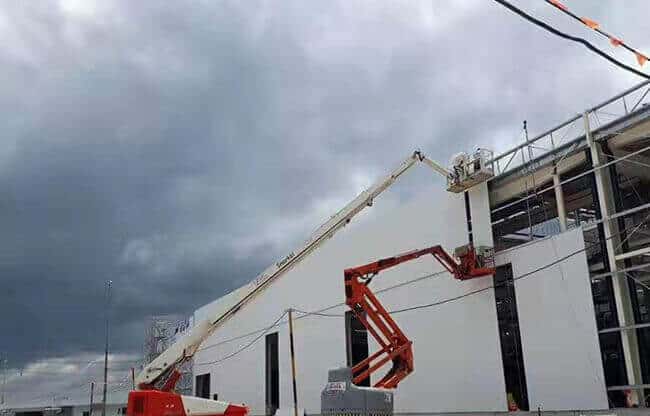
The installation of Wall Panel
The installation of Wall Panel
The step of wall panel installation, which is applicable to guide the construction process of on-site, the installation of sandwich wall panels. The correct construction process and safety measures, combined with this installation step and construction drawings, it can ensure the project at the lowest cost and the fastest speed.
Before installing the sandwich wall panel, and related edge trimming accessories, please read this installation procedure and install drawing carefully to ensure a smooth installation.
Wall Panel Installation
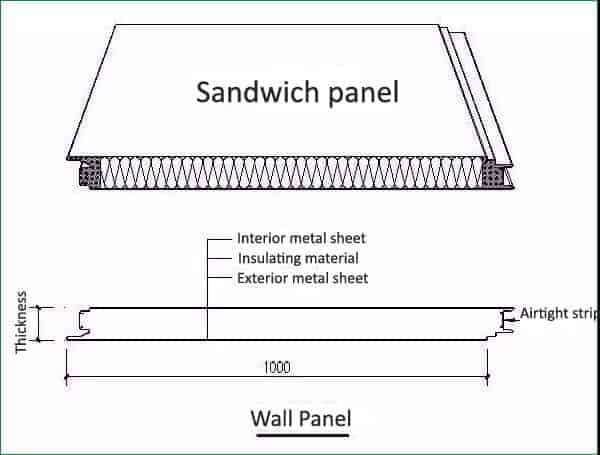
PU Sandwich Panel
1. Stack up
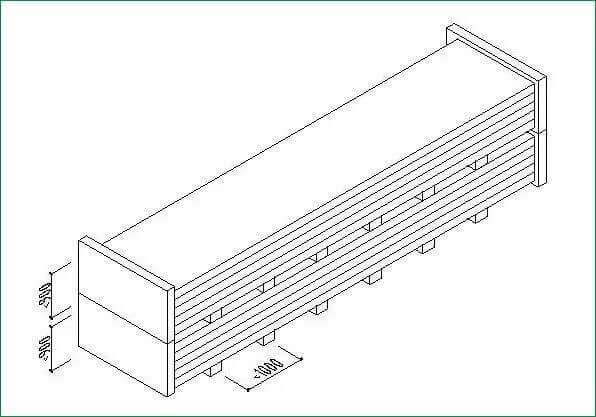
A. The storage location must be flat, reliable, clean, and ventilated. The storage yard should be as close as possible to the area where the outer wall panel installation to avoid secondary transportation over a long distance.
B. When stacking, pay attention to adjust the height with sleepers, so that the wall panels after the stacking have an inclination angle of 2 ~ 5 ° C, so that even if water enters between the outer wall panels, water will not stay on the exterior wall panels. If it places outdoors, it must completely cover with the waterproof cloth. The exposed part of the core material at the end of the wall panel with rock wool or glass wool as the core material should strengthen to prevent the core material from being damaged by rain.
C. The stacking ground of the exterior wall panel. It should far away from other bare steels. It prevents the rustable materials on these steels from falling and adhering to the external wall panel. It is difficult to remove and cause rust spots and penetrate the steel plates.
D. When the outer wall panels are stacked, each stack cannot exceed two boxes. Do not place heavy objects and step on the exterior wall panels to avoid damaging the finish or even the steel plate.
E. Tens of thousands of sandwich wall panels wrapped with polyethylene protective film. The film cannot expose to direct sunlight for a long time. Otherwise, it will make it difficult to peel off the protective film.
F. The edges must also be neatly stacked. If placed outdoors, they must completely cover with tarps.
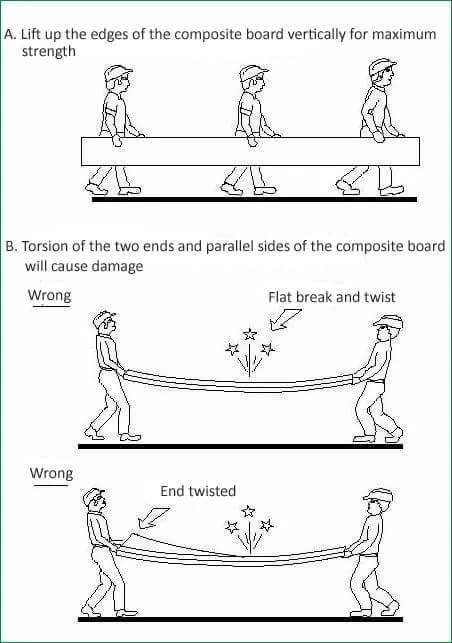
sandwich panel handling
3.Lifting
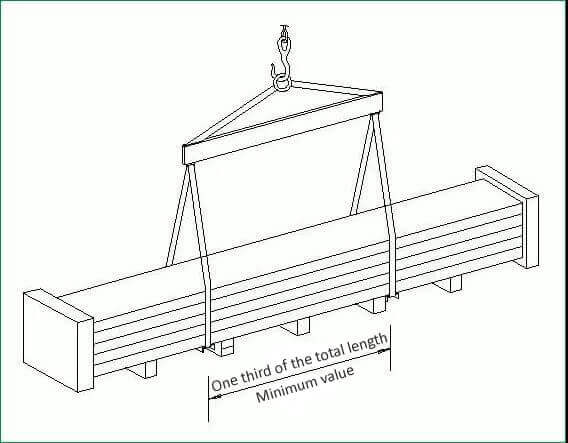
sandwich panel lifting
Bundles of external wall panels can not be lifted directly by forming a triangle between the hooks and the outer wall panels. Instead, the lifting equipment and booms provided with the project must use to vertically suspend the slings between the external wall panels and the increases. It should find after lifting the balance point. To single-bundle crane, handle it carefully and do not tow the exterior wall panel.
Wall Panel Installation
A. Handover inspection: Check that the installation of purlins can not meet the installation conditions of the envelope structure, including the deviation of the alignment line of the purlins, the verticality, the height of the bending vector, and the structural requirements of the installation.
B. Material preparation: Detailed check the specifications, model, quantity, and specifications and quantity of wall plates corresponding to the layout drawings.
C. Machine preparation: lifting equipment, portable tools, power connection equipment, scaffolding, and other temporary small accessories.
D. Technical preparation: detailed construction drawings, layout drawings, node structure drawings, etc.
E. Preparation of the site and temporary facilities: loading and unloading conditions, equipment walking route, lengthened position, horse way setting, construction road, temporary setting.
Before construction, there should be specialized detailed drawing staff to provide a technical explanation to construction technicians to ensure the smooth progress of development and the guarantee of project quality.
2.Base Trim Installation
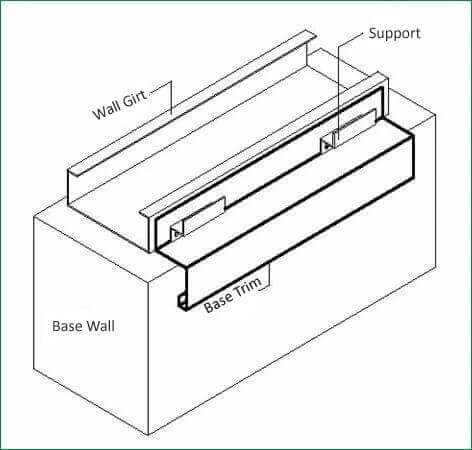
Base Trim Installation
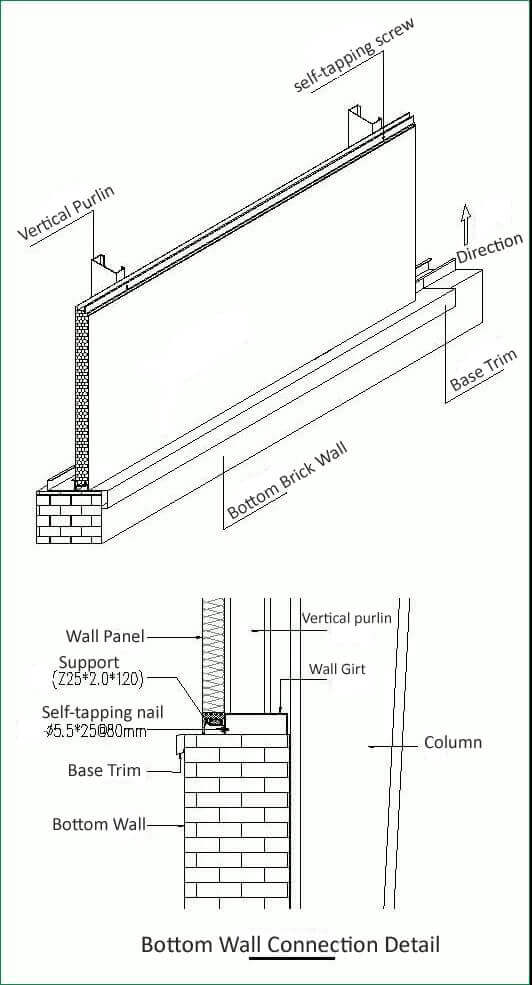
3.Wall Panel Installation
Wall Panel Installation

Base Trim
B. According to the number of the construction drawing board, install and adjust the starting plate; the starting bracket fixes the bottom (side) of the starting plate, and the level of the leveling compound board measured at the end of the installation. The scale of the composite board with a level ruler at the end of the facility, the installation accuracy of the measurement board is ± 2mm. When it confirmed that the installation accuracy fully meets the installation tolerances, the self-tapping nails use to fix the external wall panel in the same structure;
C. The installation tolerance must be measured and adjusted for every five rows of external wall panels installed;
D. Cut the external wall panels on the spot at the doors and windows, openings, and the yin and yang corners of the building.
E. Don’t forget to remove the polyethylene protective film on the surface after the board installed.
F. The board between adjacent columns should be checked for straightness of the seam and adjusted in time to avoid misalignment.
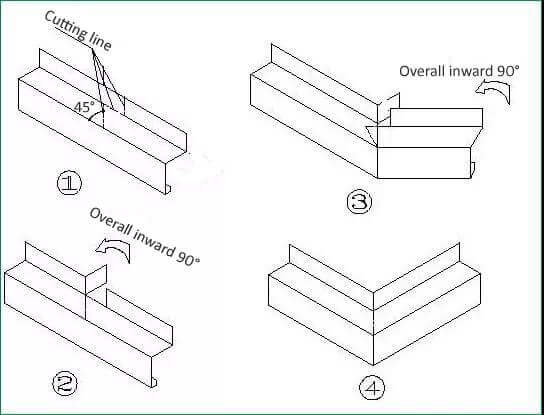
4.Installation of the wall corner panel
5. Installation of various trim
Overlap: Due to the length, part of the overlay needs to overlap. When there is a waterproof requirement for water flooding outside the wall, the overlap length is 150mm, and two rivets connect the distance between 50 ~ 100mm; For 50mm, use a rivet to fix the range of 50 ~ 100mm.
A. The installation of Base Trim
Base Trim installation
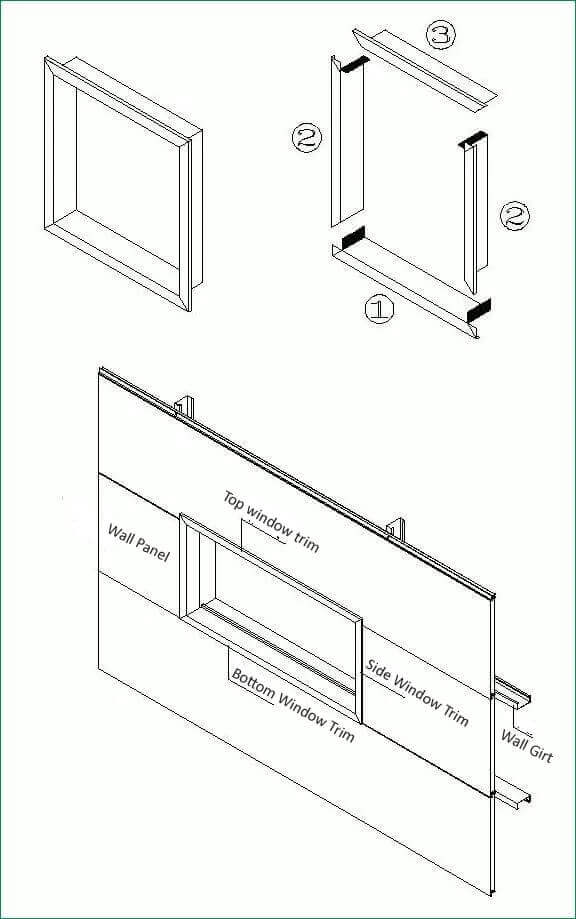
B. The Installation of Window Trim

Wall Panel Installation
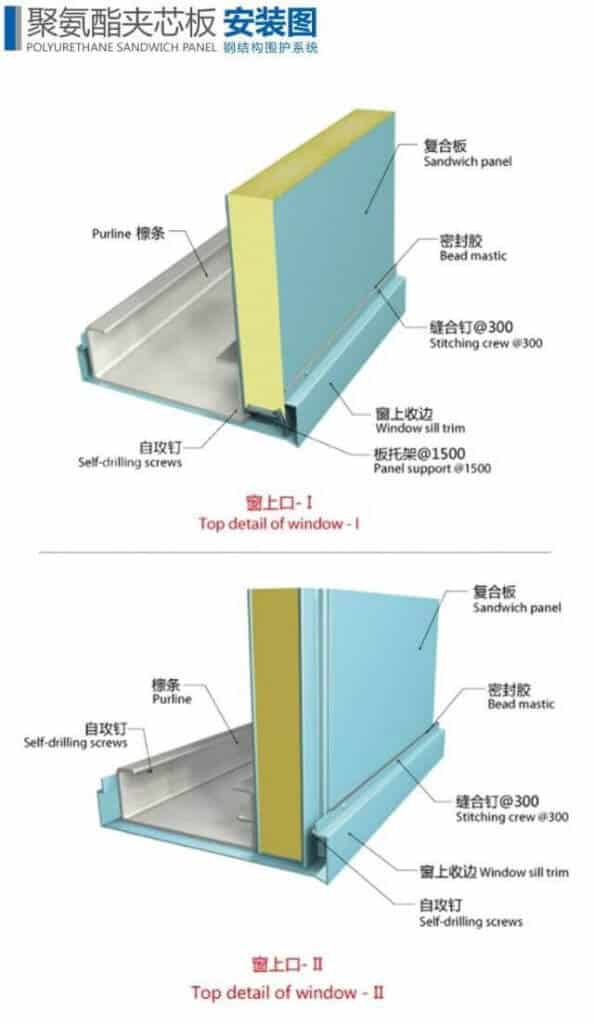
Window Trim
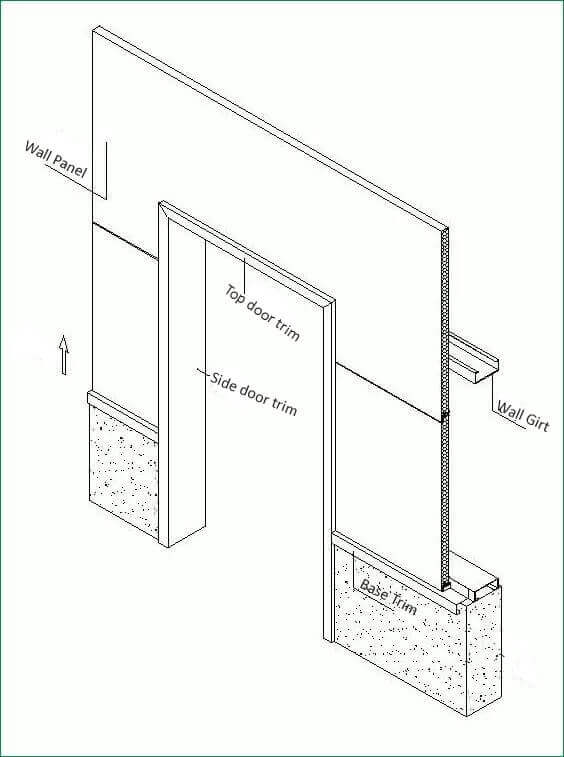
C.The installation of the door trim

D.Wall Corner Installation
Wall Corner
Base Trim installation
B. The Installation of Window Trim
Wall Panel Installation
Wall Panel Installation
Window Trim
C.The installation of the door trim
Wall Panel Installation
D.Wall Corner Installation
Wall Corner

Wall Corner Trim

Wall Corner
- Pre:None
- Next:High-rise Steel Structure Buil 2024/4/20